
TRP Secrets
Your design companion
💀News!
We have an exciting new update! A searchable image directory! Learn all about it in Images.
Buy me a coffee!

Index
Use this index to find specific keywords within the guide.
A
B
C
D
E
F
G
H
I
K
L
M
P
R

Discord
Our community is always here to help!
• Questions • Commissions • Competitions
✔️ Edit the BBcode to match the col code used in TRP:
[color=#896BFF]T[/color][color=#8672FF]R[/color][color=#837AFF]P[/color] [color=#7E8AFF]S[/color][color=#7B92FF]e[/color][color=#7899FF]c[/color][color=#75A1FF]r[/color][color=#73A9FF]e[/color][color=#70B1FF]t[/color][color=#6DB9FF]s[/color]
➕ Try this scratch pad:
[color=#896BFF]T[/color][color=#8672FF]R[/color][color=#837AFF]P[/color] [color=#7E8AFF]S[/color][color=#7B92FF]e[/color][color=#7899FF]c[/color][color=#75A1FF]r[/color][color=#73A9FF]e[/color][color=#70B1FF]t[/color][color=#6DB9FF]s[/color] 
Oops!
This page is under construction. Check back later!

Templates
Enjoy some free templates courtesy of the wonderful designers in our community.
The Woodsman
Novice Scribe Nithalisa


➖ DESIGNER'S NOTES:
The more text you add to the segments, the more the dividers below them will move!!!
Moonlit Hunter
Artisan Scribe ☽Jinx☾


Moth-Eaten Tomb
Artisan Scribe ☽Jinx☾

Darkside of the Moon
Artisan Scribe ☽Jinx☾

Crypt Keeper
Artisan Scribe ☽Jinx☾

Void Expanse
Novice Scribe Nithalisa
➖ DESIGNER'S NOTES:
If you add more paragraphs or another section to the core of the layout, you will need to change the length of two pieces of the layout to ensure that the borders continue down to where they end up in the final product.
They are as follow:{img:interface/glues/models/ui_voidelf/7fx_argus_void_tendrils01:75:775:l} {img:interface/glues/models/ui_voidelf/7fx_argus_void_tendrils01:75:775:r}
Change the Bolded sections to an appropriate length for your layout. Happy editing.

Images
To add and edit images not provided within the TRP addon, follow these steps. This guide has been revised to utilize wow.export due to its searchability. Find the old GitHub repo guide here.
1. Search
✔️ First, check out our guide on using wow.export.
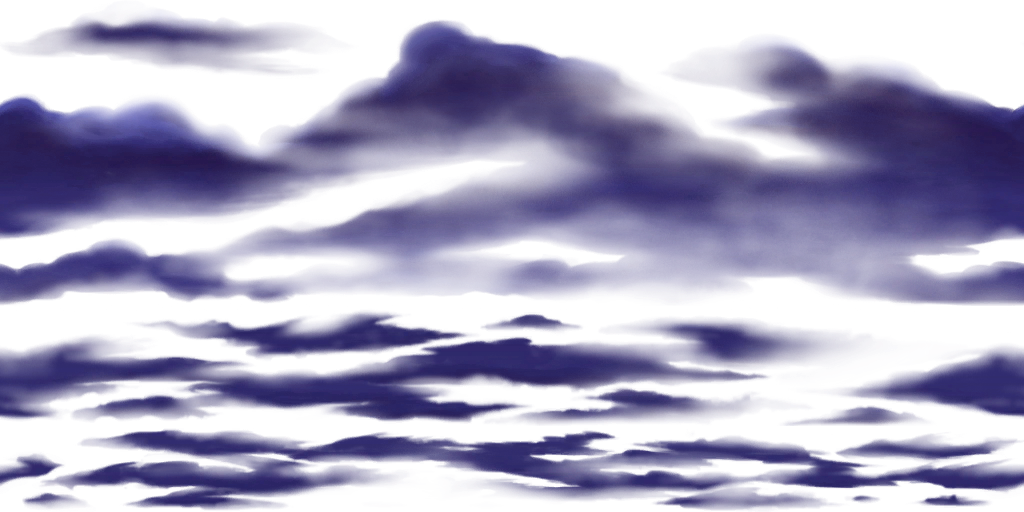
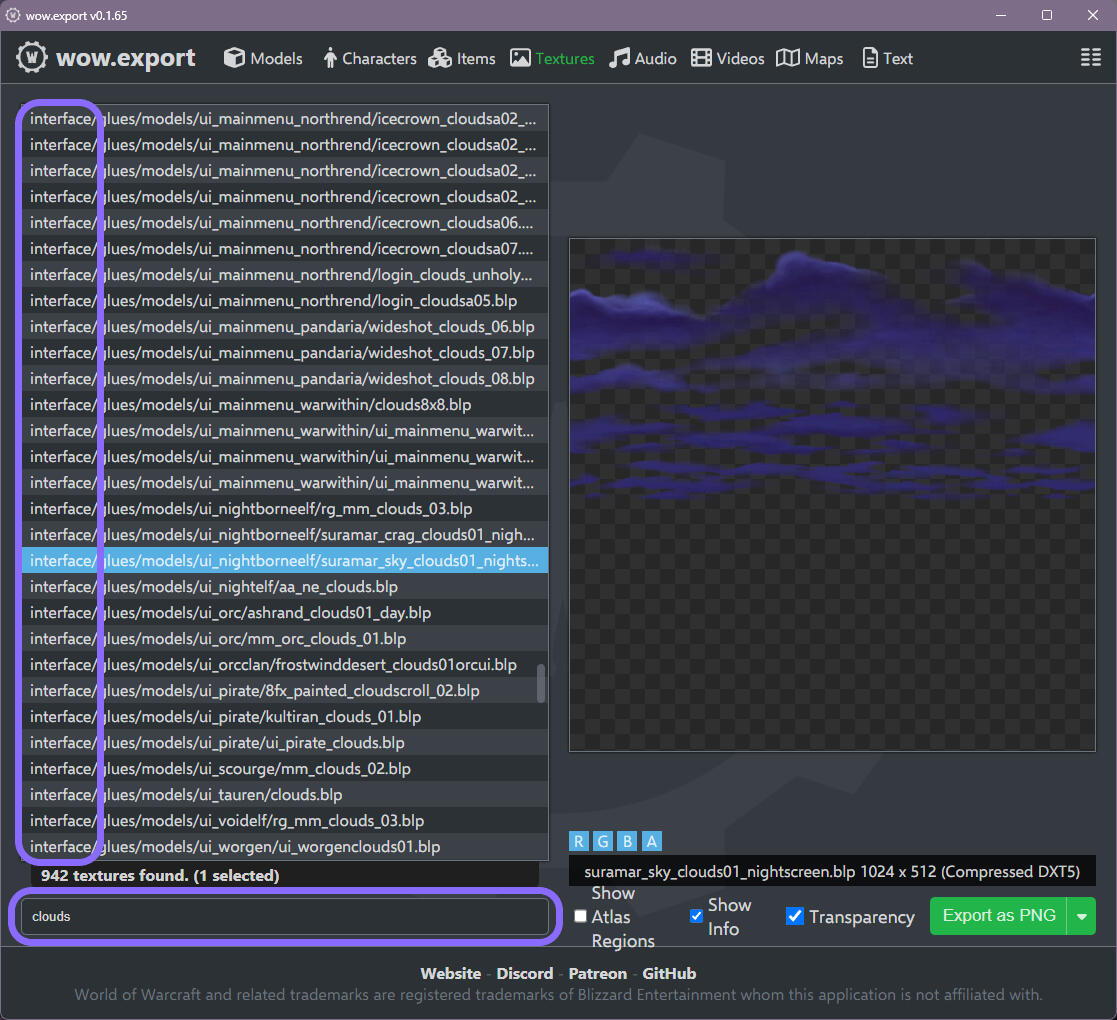
✔️ As a starting point, search "clouds":
interface/glues/models/ui_nightborneelf/suramar_sky_clouds01_nightscreen.blp
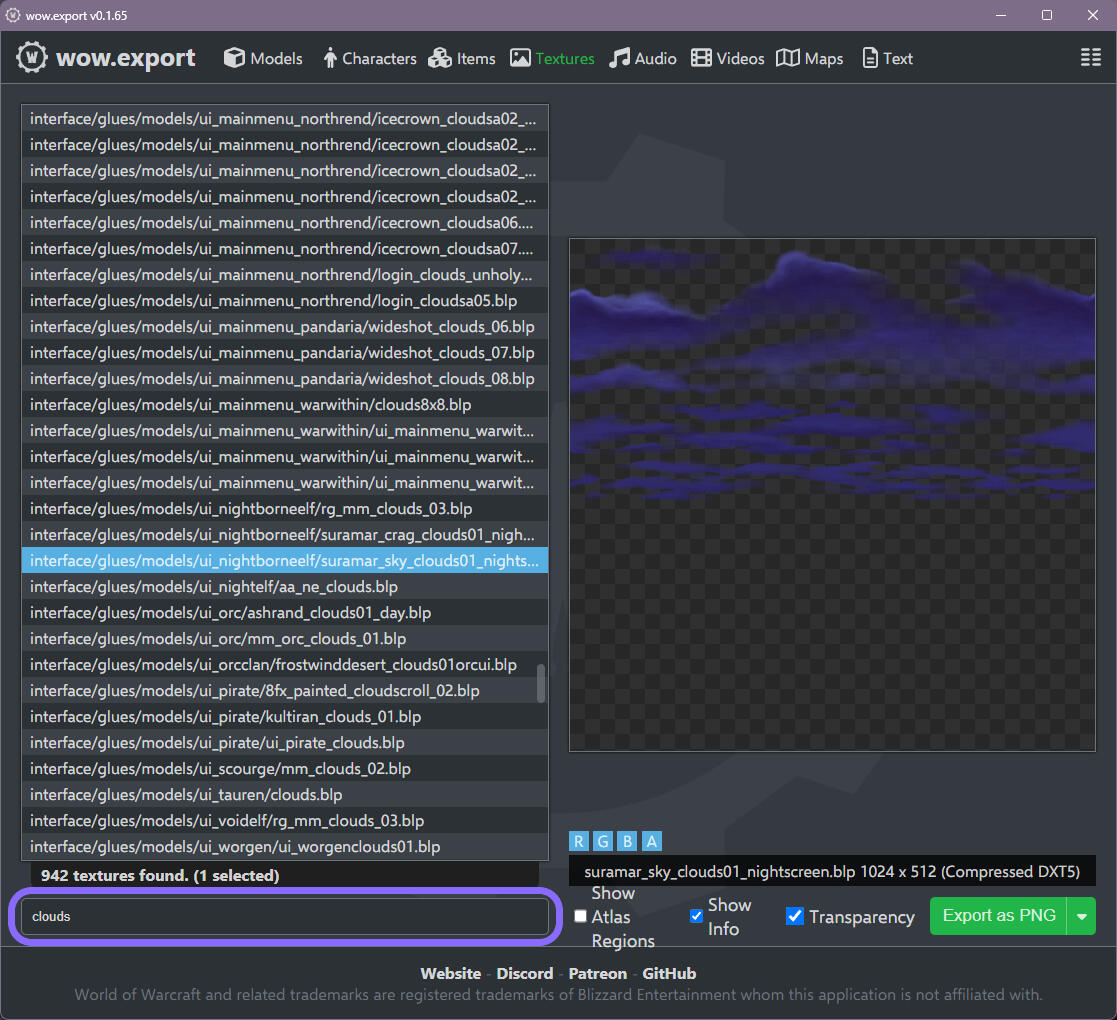
➖ TIPS:
• Look for file names beginning with "inferface".
2. Dimensions
⇣ Skip if you're not looking for exact dimensions.
✔️ Look to the bottom right-hand section.
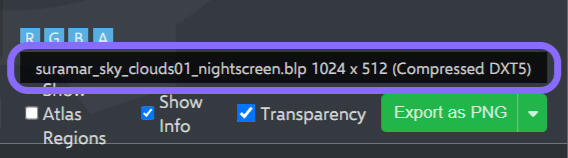
✔️ The dimensions are 1024x512. Hold on to that.
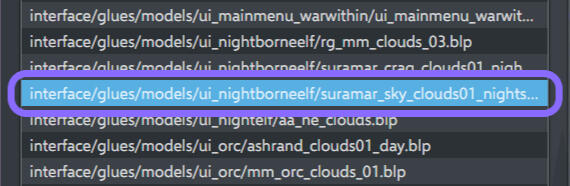
3. Code
✔️ Select and copy (Ctrl+C) the file name and trim it as shown:
interface/glues/models/ui_nightborneelf/suramar_sky_clouds01_nightscreen.blp ⇠ don't forget the file type
✔️ Plug it into the img code used in TRP and add the correct dimensions:
{img:______:000:000}
➕ Try this scratch pad:
🟰
{img:interface/glues/models/ui_nightborneelf/suramar_sky_clouds01_nightscreen:1024:512}
4. Scale
⇣ Skip if you don't want to scale your image.
✔️ Use this scaling tool. Plug in the original dimensions and the target width or height:
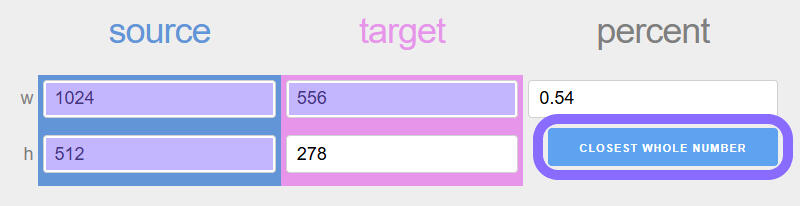
✔️ Copy the results and edit your img code:
{img:interface/glues/models/ui_nightborneelf/suramar_sky_clouds01_nightscreen:556:278}➖ TIPS:
• For image integrity, avoid scaling larger than the original dimensions.
• It seems ~555 width is the sweet spot for TRP's default dimensions.
5. Background
⇣ Skip if you don't want the image to be in the background.
✔️ Add :L(left) or :R(right) after the dimensions:
{img:interface/glues/models/ui_nightborneelf/suramar_sky_clouds01_nightscreen:1024:512:l}

Spacing
✔️ Images appear where you paste their code in your profile. To create vertical space between them, leave multiple blank lines between each code.Layering
✔️ If you want to layer images, leave zero spaces between each img code.➖ TIPS:
• To darken an image, try layering this image over it with whatever dimensions you need:
{img:interface/dialogframe/ui-dialogbox-background:000:000}
Tip from Artisan Scribe Melwinne!
Issues
Images are not meant to be layered, therefore you may not always achieve your desired effect.✖️ The background's strata isn't affected by code order.
✖️ Any loading screen could cause layer shuffling.
✖️ Not all images will shuffle when layered.➖ FIX:
Reload your UI to see how layered images will settle.

Repo Images
To add and edit images not provided within the TRP addon, follow these steps. All images here were datamined from the existing game files. Find the new wow.export guide here.
1. Search
✔️ Follow this link to search for images. As a starting point, find GLUES like this one:
https://github.com/keyboardturner/wow-ui-art/blob/retailpng/GLUES/Models/UINightborneElf/SuramarSkyClouds01_nightSCREEN.png
2. Dimensions
⇣ Skip if you're not looking for exact dimensions.
✔️ Right click > Open image in new tab
✔️ Mouseover the new tab to see this:
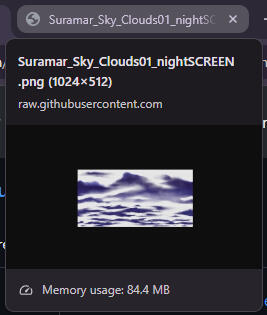
✔️ The dimensions are 1024x512. Hold on to that.
3. Code
✔️ Copy the URL and trim it as shown:
https://github.com/keyboardturner/wow-ui-art/blob/retail_png/GLUES/Models/UI_NightborneElf/Suramar_Sky_Clouds01_nightSCREEN.png ⇠ don't forget the file type✔️ Plug it into the img code used in TRP and add the correct dimensions:
{img:Interface______:000:000}
➕ Try this scratch pad:
🟰
{img:Interface/GLUES/Models/UI_NightborneElf/Suramar_Sky_Clouds01_nightSCREEN:1024:512}
4. Scale
⇣ Skip if you don't want to scale your image.
✔️ Use this scaling tool. Plug in the original dimensions and the target width or height:

✔️ Copy the results and edit your img code:
{img:Interface/GLUES/Models/UI_NightborneElf/Suramar_Sky_Clouds01_nightSCREEN:556:278}➖ TIPS:
• For image integrity, avoid scaling larger than the original dimensions.
• It seems ~555 width is the sweet spot for TRP's default dimensions.
5. Background
⇣ Skip if you don't want the image to be in the background.
✔️ Add :L(left) or :R(right) after the dimensions:
{img:Interface/GLUES/Models/UI_NightborneElf/Suramar_Sky_Clouds01_nightSCREEN:1024:512:l}

Spacing
✔️ Images appear where you paste their code in your profile. To create vertical space between them, leave multiple blank lines between each code.Layering
✔️ If you want to layer images, leave zero spaces between each img code.➖ TIPS:
• To darken an image, try layering this image over it with whatever dimensions you need:
{img:Interface/DialogFrame/UI-DialogBox-Background:000:000}
Tip from Artisan Scribe Melwinne!
Issues
Images are not meant to be layered, therefore you may not always achieve your desired effect.✖️ The background's strata isn't affected by code order.
✖️ Any loading screen could cause layer shuffling.
✖️ Not all images will shuffle when layered.➖ FIX:
Reload your UI to see how layered images will settle.

Text
To use different fonts and make rainbow text, follow these steps. So far, I've only discovered the three fonts explained here.

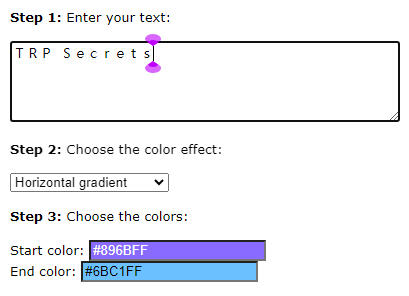
3. Code
✔️ Edit the BBcode to match the col code used in TRP:
[color=#896BFF]T[/color][color=#8672FF]R[/color][color=#837AFF]P[/color] [color=#7E8AFF]S[/color][color=#7B92FF]e[/color][color=#7899FF]c[/color][color=#75A1FF]r[/color][color=#73A9FF]e[/color][color=#70B1FF]t[/color][color=#6DB9FF]s[/color]
➕ Try this scratch pad:
🟰
{col:896BFF}T{/col}{col:8672FF}R{/col}{col:837AFF}P{/col} {col:7E8AFF}S{/col}{col:7B92FF}e{/col}{col:7899FF}c{/col}{col:75A1FF}r{/col}{col:73A9FF}e{/col}{col:70B1FF}t{/col}{col:6DB9FF}s{/col}➖ TIPS:
• You can make this part easier by plugging in this conversion format to an AI chatbot like ChatGPT.
4. Insert
✔️ Add a 一 kanji character to make the font visible.
✔️ Use this eyedropper to grab the background color. Hide the kanji by making it that color:
➖ TIPS:
• Kanji have a shadow which is still visible on light backgrounds.
• You don't have to wrap all your text in kanji.
• The kanji will only break if it's separated from the text by major code strings like headers.
Others
Manga Font
✔️ Add a 一 kanji character to make this font visible:

Bubble Font
✔️ Add a ㅇ hangul character to make this font visible:

➖ TIPS:
• This font doesn't work for capital letters.
Antrophobia Font
✔️ Add a ㅇ hangul character to make this font visible:

➖ TIPS:
• This font doesn't work for letters: e, j, s
Found by Artisan Scribe seeni!
Issues
Since fonts are technically symbols, they can be affected by the same compatibility issues.✖️ Viewers using ElvUI or similar UI addons might not see all symbols.
✖️ PC users who have not yet upgraded to Windows 11 may not see all symbols.
✖️ TRP tooltip settings could interfere with your ability to see some symbols.➖ FIX:
Total RP 3: Settings > Tooltip
• Max "Currently" information length > 200
• Max "Currently" line breaks > 20

Symbols
To use various symbols, check out these tips. This symbol collection is not exhaustive, but others will be added as necessary.
Kanji
✔️ Use a 一 kanji character to make certain symbols visible.➖ TIPS:
• You don't have to wrap all your symbols in kanji.
• The kanji will only break if it's separated from the symbol by major code strings like headers.
• Hide the kanji by making it the same color as your background:
➕ OTHERS:
人 十 日 三 米 二 田 目 山 回
Hangul
✔️ Use a ㅇ hangul character to make other symbols visible.➖ TIPS:
• Kanji and hangul could break if placed together in the same code string.
• Swapping a kanji for a hangul to support a different symbol might alter special text:
➕ OTHERS:
ㅅ ㅍ ㅁ ㄹ ㅂ ㅡ ㅣ ㄱ ㄴ
Dependent
Hangul Only
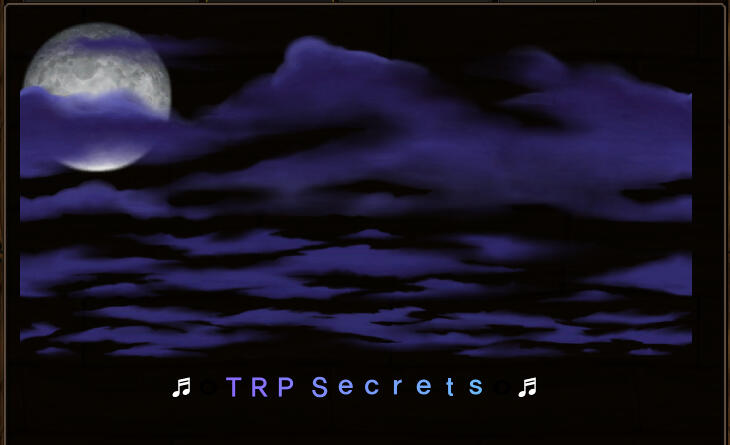
✔️ These symbols are only visible near a hangul:
♥ ♡ ♠ ♤ ♣ ♧ ♩ ♪ ♬ ♭ ☜ ☞ ⇔ ↕ ↔ √ ◈ ◀ ◁ ▶ ▷ ▤ ▥ ▦ ▧ ▨ ▩ ▣ ◐ ◑
➖ TIPS:
• Regardless of these work arounds, some symbols may break each other.
➕ OTHERS:
• Greek Letters
Found by Artisan Scribe seeni!
Kanji & Hangul
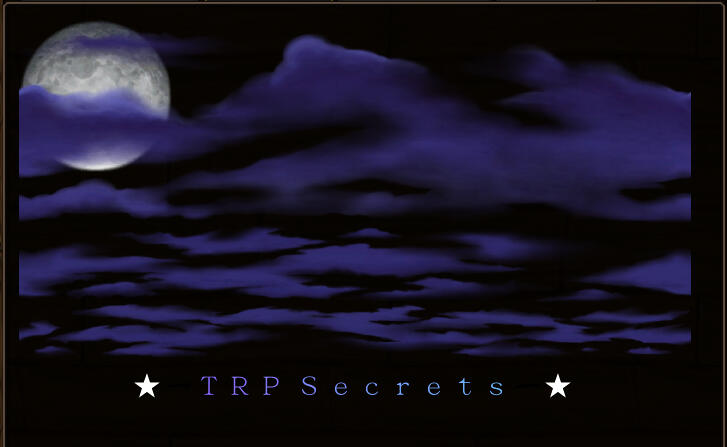
✔️ These symbols are only visible near a kanji or hangul:
★ ☆ № ㏒ ♀ ♂ ※ ∮ ∈ ∝ ∩ ∴ ∵ ∷ ⊕ ☉ ⊙ ◎ ● ╳ △ ▽ ▲ ▼ ◣ ◢ ◤ ◥ ◆ ◇ ■ □ 彡 ミ ┇ ┋ ┅ ┉ 〓 ↖ ↗ ↘ ↙ ↑ ↓ → ←
➕ OTHERS:
• Roman Numerals • Brackets • Corners
Independent
✔️ These symbols work within TRP naturally:
© ® ™ ¤ ø ≠ † ‡ ∞ ∫ ∆ ◊ ï ¡ ° º « » ×
Invisible
✔️ Use a (Alt+255) to hide the rank in guilds & custom guilds:
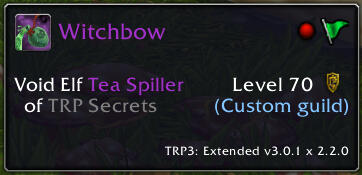
➖ TIPS:
• This will not work if you use an addon that alters your UI fonts, like ElvUI.
Issues
✖️ Viewers using ElvUI or similar UI addons might not see all symbols.
✖️ PC users who have not yet upgraded to Windows 11 may not see all symbols.
✖️ TRP tooltip settings could interfere with your ability to see some symbols.➖ FIX:
Total RP 3: Settings > Tooltip
• Max "Currently" information length > 200
• Max "Currently" line breaks > 20

Icons
To make tooltips and links with icons, check out these tips.
Tooltips
✔️ {link*Your text here*Paste icon here}
➖ TIPS:
• Find icons easier by searching Wowhead.
• Resize icons by changing the number at the end of the code.
Links
✔️ {link*Your link here*Paste icon here}

Wow.Export
Follow these simple steps to download and use the wow.export program. This guide is made possible by Proctor at.moonkin!
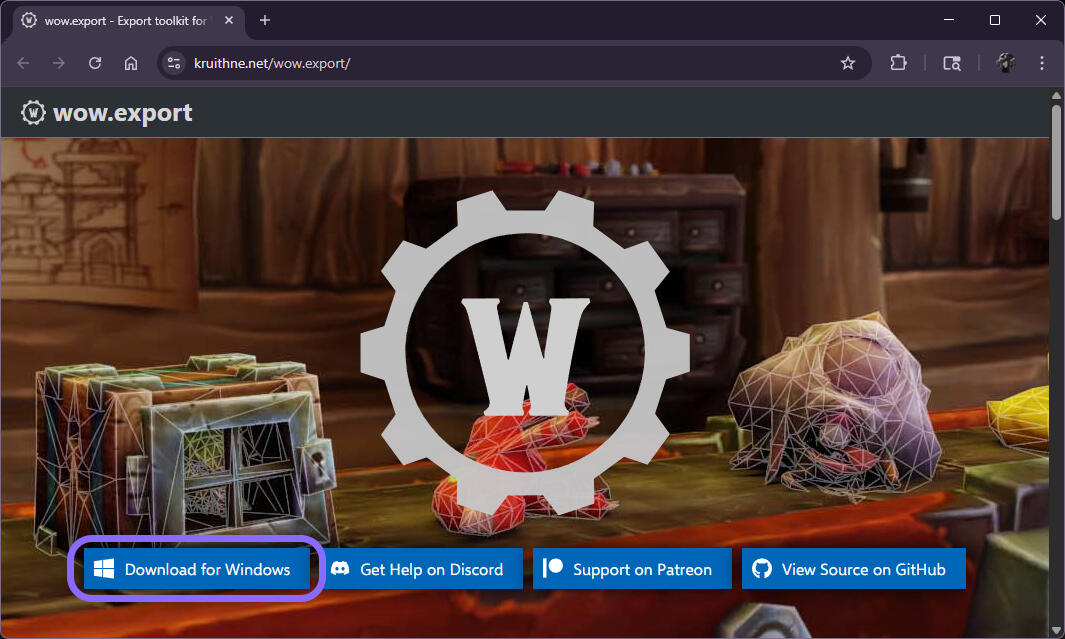
1. Download
✔️ Follow this link to download the program.
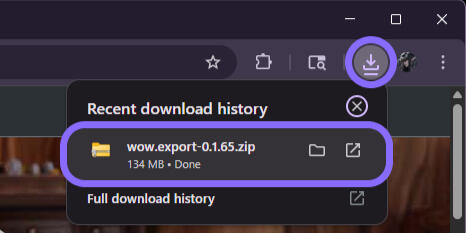
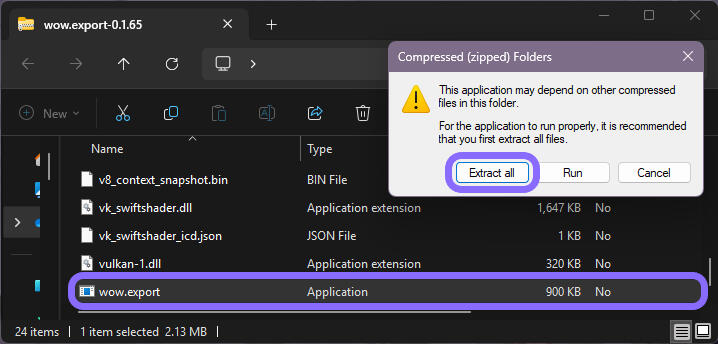
✔️ Click the Downloads icon > click the file or Show in Folder
✔️ Double-click wow.export > Extract all
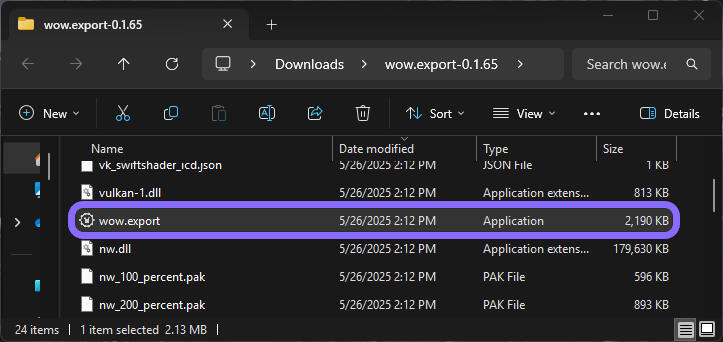
2. Launch
✔️ Double-click wow.export to launch the program.➖ TIPS:
• Right-click > Pin to Start for future use
✔️ Select an access method. This is personal preference.
Open Local Installation uses your game files.
Use Blizzard CDN uses public games files.
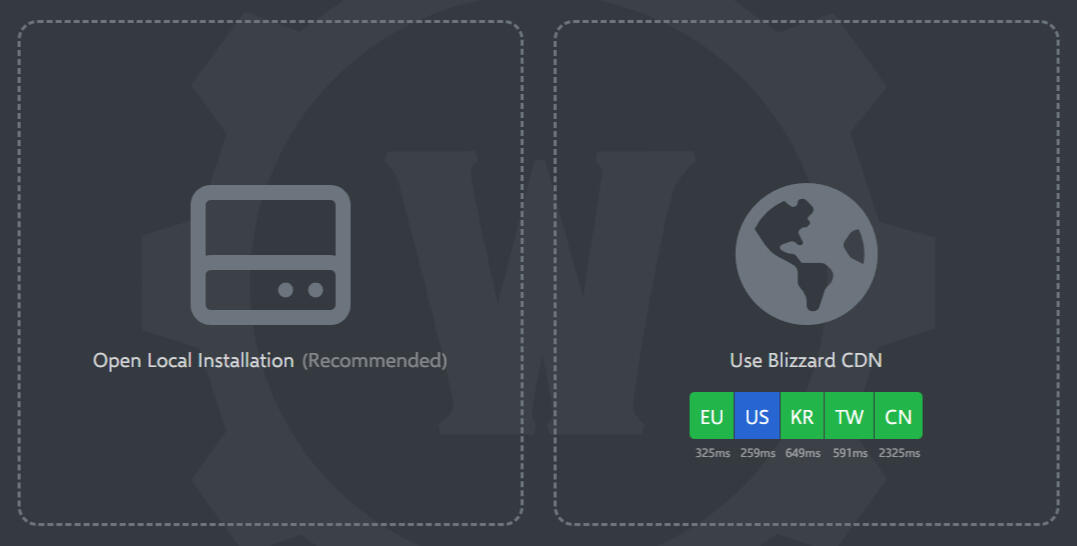
✔️ For this guide, we're going to select Use Blizzard CDN > US > World of Warcraft 11.1.5

3. Search
✔️ Select Textures from the menu bar at the top.

✔️ Use the search bar at the bottom to search for keywords, like "clouds".➖ TIPS:
• Look for file names beginning with "inferface".
• Easily navigate with your ↑↓ arrow keys.
✔️ You may now return to Images.
Tools
A compilation of my favorite tools and resources.